Table of Contents
Are your gorgeous calla lilies looking a little worse for wear? Are those elegant blooms flopping over instead of standing tall and proud? Don't despair! Seeing your calla lily flowers falling over can be disheartening, but it's a common problem with easily fixable solutions. This article will guide you through the most common reasons why your calla lilies might be drooping, from simple environmental issues to more serious problems like pests and diseases. We'll explore the crucial role of proper watering and sunlight, the importance of healthy soil and fertilizer, and how to effectively combat any unwelcome pests or diseases that might be affecting your plants. We'll cover everything you need to know to diagnose the issue and get your calla lilies back to their vibrant best, ensuring those stunning flowers stand tall and command attention. Prepare to learn the secrets to preventing "calla lily flowers falling over" and enjoy the beauty of these elegant blooms for years to come. Let's get started!
Calla Lily Flowers Falling Over: Common Causes

Calla Lily Flowers Falling Over: Common Causes
Environmental Stress: Too Much or Too Little
Let's start with the basics. Calla lilies are sensitive souls. They don't like extremes. Too much sun can scorch their leaves, causing them to wilt and droop. Think of it like you after a day at the beach without sunscreen – ouch! Similarly, too little sun leaves them weak and unable to support their heavy blooms. They need a happy medium, usually several hours of indirect sunlight.
Temperature swings can also be a culprit. Sudden drops in temperature or consistently cold conditions can shock the plants, leading to drooping flowers. Imagine yourself shivering in a winter storm – not a pretty sight! Calla lilies are happiest in consistently warm temperatures.
Condition | Effect on Calla Lilies | Solution |
|---|---|---|
Too much direct sun | Scorched leaves, wilting flowers | Provide shade during the hottest part of the day |
Too little sun | Weak growth, few flowers | Move to a sunnier location (but avoid direct afternoon sun) |
Temperature fluctuations | Shock, drooping flowers | Provide consistent, warm temperatures |
Watering Woes: A Delicate Balance
Watering is another biggie. Underwatering is a common cause of drooping, as the plant simply doesn't have enough moisture to support itself. The leaves and flowers will lose their turgor, becoming limp and lifeless. It's like forgetting to drink water on a long hike – you'll feel pretty droopy too!
Overwatering, however, is equally problematic. Soggy soil suffocates the roots, preventing them from absorbing nutrients and water. This leads to root rot and overall plant decline. It’s like drowning your feet in a bathtub – not pleasant. The key is consistently moist but well-drained soil.
- Water deeply but infrequently, allowing the soil to dry slightly between waterings.
- Ensure good drainage to prevent waterlogging.
- Use a pot with drainage holes if growing indoors.
Nutrient Neglect: Feeding Your Flowers
Finally, let's talk nutrients. Calla lilies are hungry plants. They need a balanced diet to thrive and produce those magnificent blooms. A lack of essential nutrients, particularly nitrogen, can lead to weak growth and drooping flowers. It's like trying to run a marathon on an empty stomach – you won't get very far!
Conversely, too much fertilizer, especially nitrogen, can cause lush foliage but fewer blooms. The plant puts all its energy into leaf growth, neglecting the flowers. It's a bit like a teenager obsessed with video games; all fun and no responsibility. A balanced approach is key!
Troubleshooting Calla Lily Droop: Watering and Sunlight

Troubleshooting Calla Lily Droop: Watering and Sunlight
Diagnosing Watering Issues
Let's tackle watering first. Remember, we're aiming for consistently moist but not soggy soil. If your calla lilies are drooping and the soil feels bone dry, underwatering is the likely culprit. Give them a good, deep watering, ensuring the water reaches the roots. Don't just sprinkle the surface; that's like giving a thirsty person a single drop of water – not nearly enough! You'll see improvement within a day or two, as the plants rehydrate. However, if the soil is already wet and the leaves are still drooping, you've got a different problem.
Overwatering is a sneaky villain. It can manifest as yellowing leaves and a generally unhappy plant, even if the soil feels damp. The roots are essentially drowning, unable to take up the nutrients and water they need. In this case, you need to let the soil dry out significantly before watering again. You might even consider repotting with fresh, well-draining soil to give those roots a fresh start. Think of it like giving your feet a chance to breathe after being stuck in soggy shoes all day.
Symptom | Cause | Solution |
|---|---|---|
Dry soil, drooping leaves | Underwatering | Deep watering, check soil moisture regularly |
Damp soil, yellowing leaves, drooping | Overwatering | Allow soil to dry out, improve drainage, consider repotting |
Sunlight Solutions: Finding the Goldilocks Zone
Now, let's talk about sunlight. Calla lilies need a good amount of light, but not necessarily direct, scorching sun. Direct sunlight, especially during the hottest part of the day, can burn their leaves, leading to drooping. Think of it as a sunburn for your plants. If your calla lilies are drooping and their leaves look scorched or crispy, move them to a shadier location. A spot with several hours of morning sun and afternoon shade is ideal.
However, too little sunlight can also cause problems. Plants that are constantly in the shade will be weak and leggy, with fewer blooms. They won't have the energy to support their heavy flowers. If your calla lilies are drooping and seem generally weak, try moving them to a brighter spot, but remember to protect them from the intense midday sun. It's all about finding that sweet spot where they get enough light to thrive, but not so much that they get burned. Think of it as finding the Goldilocks zone for your calla lilies – not too much, not too little, but just right.
- Observe your calla lilies throughout the day to determine their sun exposure.
- Experiment with different locations to find the optimal balance of sun and shade.
- Consider using shade cloth during the hottest parts of the day if necessary.
Preventing Calla Lily Flowers Falling Over: Soil and Fertilizer

Preventing Calla Lily Flowers Falling Over: Soil and Fertilizer
Soil Selection: The Foundation for Success
The right soil is crucial for preventing those dreaded drooping blooms. Calla lilies prefer rich, well-draining soil that retains moisture without becoming soggy. Think of it as a comfy bed for your plant's roots – not too hard, not too soft, just right! Heavy clay soils can lead to waterlogging, while sandy soils drain too quickly, leaving the roots thirsty. A good mix of peat moss, perlite, and garden soil usually works well. Amend heavy clay soils with organic matter like compost to improve drainage. For sandy soils, add some peat moss to help retain moisture. This well-balanced soil provides the perfect environment for healthy root growth, which is essential for supporting those elegant flowers.
Remember, healthy roots are the foundation of a strong and vibrant plant. Just like a building needs a solid foundation, your calla lilies need healthy roots to stand tall and produce beautiful blooms. If you suspect your soil might be the culprit, repotting your plants in fresh, well-draining soil can often work wonders. This gives the roots a fresh start and provides the nutrients they need to thrive.
Soil Type | Pros | Cons | Solution |
|---|---|---|---|
Clay | Retains moisture | Poor drainage | Amend with compost or perlite |
Sandy | Excellent drainage | Dries out quickly | Amend with peat moss or coco coir |
Peat-based | Good drainage and moisture retention | Can be acidic | Adjust pH if needed |
Fertilizing for Flourishing Blooms
Now, let's talk about feeding your calla lilies. A balanced fertilizer is essential for promoting healthy growth and abundant blooms. Think of fertilizer as a multivitamin for your plants – it provides the essential nutrients they need to grow strong and healthy. A balanced, slow-release fertilizer is ideal, as it provides a steady supply of nutrients without burning the roots. Avoid fertilizers high in nitrogen, as this can lead to excessive foliage at the expense of flowers – remember the video game-obsessed teenager? A balanced formula will support both lush foliage and bountiful blooms. Follow the package instructions carefully, and remember that less is often more when it comes to fertilizing.
Over-fertilizing can be just as harmful as under-fertilizing. Too much fertilizer can burn the roots, leading to stunted growth and drooping flowers. It's like giving your plant too much of a good thing – it can backfire! Always err on the side of caution, and remember that regular, moderate feeding is better than occasional heavy applications. Pay close attention to your plants; if you see signs of fertilizer burn (brown or yellow leaf tips), reduce the amount of fertilizer you're using. Healthy soil and balanced feeding are key to preventing those drooping calla lilies and ensuring a stunning display of blooms.
- Use a balanced, slow-release fertilizer.
- Avoid fertilizers high in nitrogen.
- Follow package instructions carefully.
- Monitor your plants for signs of over-fertilization.
Saving Your Drooping Calla Lilies: Disease and Pest Control

Saving Your Drooping Calla Lilies: Disease and Pest Control
Identifying and Addressing Diseases
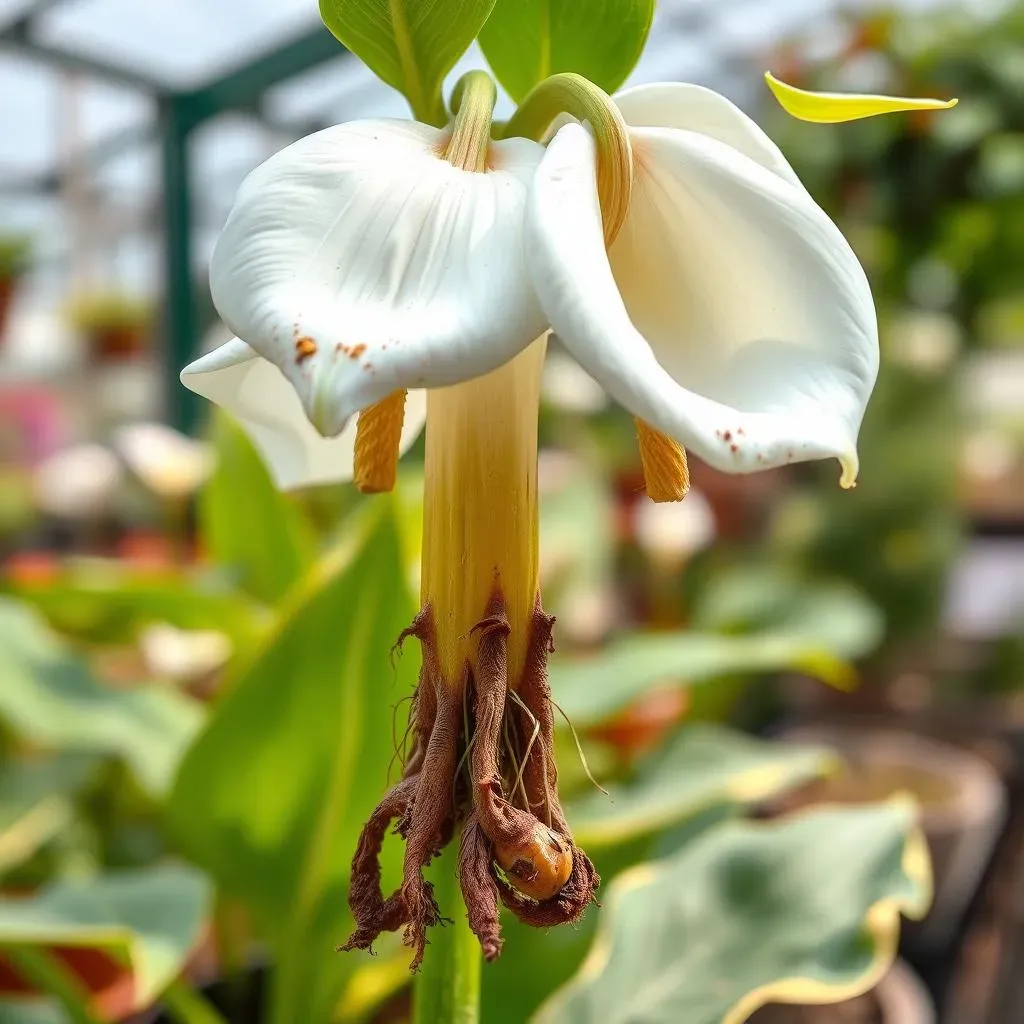
Sometimes, drooping calla lilies are victims of nasty diseases. Fungal infections are common culprits, often thriving in damp, poorly-ventilated conditions. Root rot, for example, is a serious disease that can cause wilting and yellowing leaves. Look for signs like mushy or discolored roots, and a generally unhealthy appearance of the plant. Anthracnose is another fungal foe, causing leaf spots and eventually plant decline. Early detection is key; if you see any suspicious spots or discoloration, isolate the affected plant to prevent the disease from spreading.
Treating fungal diseases often involves improving growing conditions, ensuring good air circulation, and using a fungicide. Always follow the instructions on the fungicide label carefully, and remember that prevention is always better than cure. Improving drainage, avoiding overhead watering, and providing adequate spacing between plants can help prevent fungal infections. It’s a bit like keeping your house clean to avoid getting sick. A healthy environment is a happy environment, and a happy environment leads to healthy, thriving plants.
Disease | Symptoms | Treatment |
|---|---|---|
Root rot | Mushy roots, wilting leaves | Improve drainage, fungicide, repotting |
Anthracnose | Leaf spots, plant decline | Fungicide, improve air circulation |
Pest Patrol: Protecting Your Plants
Pests can also wreak havoc on your calla lilies, causing stress and wilting. Aphids, for example, are tiny sap-sucking insects that can weaken the plant, leading to drooping flowers. They often cluster on the undersides of leaves and can be easily identified by their small size and soft bodies. Mealybugs are another common pest, leaving behind a white, cottony residue on the leaves and stems. These pests also suck plant sap, leaving the plants weakened and susceptible to disease.
Controlling pests often involves a combination of methods. Regularly inspect your plants for any signs of infestation. For minor infestations, you might be able to remove pests manually with a cotton swab dipped in rubbing alcohol. For more severe infestations, insecticidal soap or neem oil can be effective. Always follow the instructions on the product label carefully, and consider using a systemic insecticide as a last resort. Prevention is again key; maintaining healthy plants through proper watering, fertilization, and soil conditions makes them less susceptible to pest infestations. It's like building a strong immune system—a healthy plant is better able to fight off invaders.
- Regularly inspect plants for pests.
- Use insecticidal soap or neem oil for minor infestations.
- Consider systemic insecticides for severe infestations.
- Maintain healthy plants to prevent pest problems.