Table of Contents
Ready to add a touch of elegance to your garden? Then get ready to explore the world of calla lily flower bulbs! This comprehensive guide will walk you through everything you need to know, from planting these stunning blooms to nurturing them into vibrant, healthy plants. We'll cover the essential steps for planting calla lily flower bulbs successfully, ensuring your garden becomes a breathtaking display of color and form. Discover the amazing variety of calla lily flower bulbs available, with their diverse colors and unique characteristics, helping you choose the perfect ones for your space. Learn expert tips and tricks for successful cultivation, so you can enjoy these beautiful flowers season after season. Get ready to transform your garden with the captivating beauty of calla lilies – let's get started!
Planting Calla Lily Flower Bulbs: A StepbyStep Guide

Planting Calla Lily Flower Bulbs: A StepbyStep Guide
Preparing for Planting
First things first: Timing is everything! Plant your calla lily flower bulbs after the last frost and when the soil has warmed up nicely—ideally to around 65°F (18°C). This ensures your bulbs don't get a shock from cold temperatures and can happily start growing. Don't rush it! A little patience now will pay off big time later.
Next, choose a sunny spot with well-drained soil. Calla lilies love sunshine but don't like soggy feet. Think of it like this: they're like divas; they need attention and good conditions, but too much water will make them grumpy. Amend heavy clay soil with compost or other organic matter to improve drainage. This will help the bulbs get the nutrients they need and prevent rot.
Soil Type | Drainage | Sunlight |
|---|---|---|
Well-draining loam or sandy loam | Excellent | Full sun to partial shade |
Heavy clay soil | Poor (amend with compost) | Partial shade (to avoid drying out) |
Planting Your Bulbs
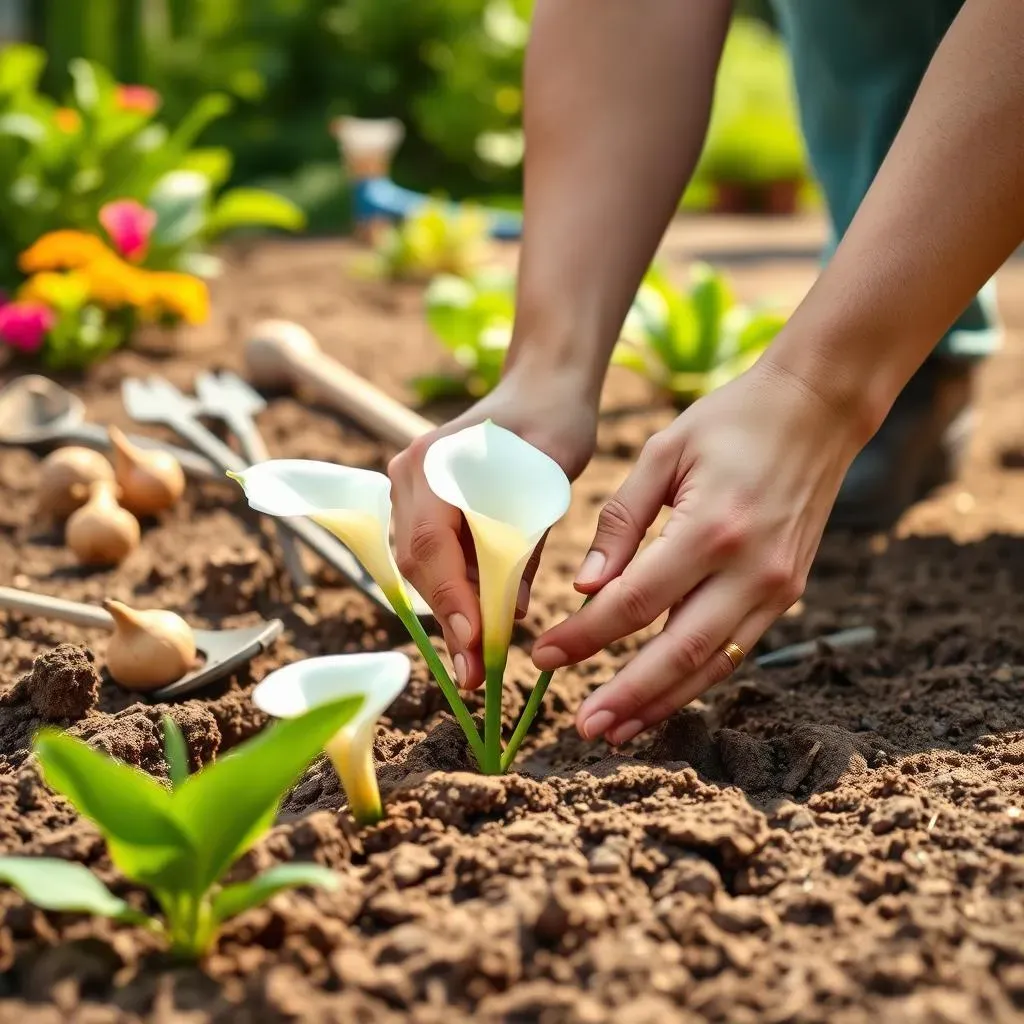
Now for the fun part: planting! Dig holes about 4 inches deep. Gently place your calla lily flower bulbs in the holes, making sure the "eyes" (the knobbly bits) face upwards. It's like giving them a little head start! Space the bulbs 12-18 inches apart, giving them room to grow and spread their beautiful leaves.
After planting, give the soil a good watering, but don't overdo it. You want the soil moist, not waterlogged. Think of it like giving them a refreshing drink, not a dunk in a swimming pool. Mulching the area with organic material like peat moss helps retain moisture and regulate soil temperature, keeping your bulbs happy and healthy.
- Dig holes 4 inches deep.
- Place bulbs with "eyes" facing up.
- Space bulbs 12-18 inches apart.
- Water thoroughly after planting.
- Add mulch to retain moisture.
Calla Lily Flower Bulbs: Varieties, Colors, and Choosing the Right Ones

Calla Lily Flower Bulbs: Varieties, Colors, and Choosing the Right Ones
A Rainbow of Calla Lilies
Let's talk color! Calla lilies aren't just your grandma's white flowers anymore. You'll find them in a dazzling array of shades, from the classic pure white to vibrant yellows, sunny oranges, deep reds, and even striking purples and almost-black varieties. The color options are endless, so you can find the perfect hue to match your garden's theme or your personal style. Imagine a border of sunny yellow callas lining your walkway, or a dramatic splash of deep purple against a backdrop of green foliage. The possibilities are truly exciting!
Beyond color, consider the size and shape of the blooms. Some varieties boast large, trumpet-shaped flowers, while others have smaller, more delicate blooms. Think about the overall look you want to achieve in your garden. Do you prefer a bold statement or a more subtle, elegant touch? Choosing the right size and shape will help you create the exact effect you're aiming for.
Color | Bloom Size | Suggested Use |
|---|---|---|
White | Large | Formal gardens, wedding arrangements |
Yellow | Medium | Cottage gardens, borders |
Purple | Small | Accent plants, containers |
Varieties to Consider
With so many varieties of calla lily flower bulbs available, it can feel a bit overwhelming to choose. But don't worry, I'm here to guide you! Some popular choices include the classic Zantedeschia aethiopica (the white calla lily), known for its elegant simplicity and hardiness. Then there's the 'Picasso' variety, with its striking multicolored blooms. Or, for something truly unique, consider the dark, almost-black 'Black Star' calla lily.
When choosing your calla lily flower bulbs, look for ones that are firm, plump, and free of any damage or signs of disease. Larger bulbs generally produce larger plants and more flowers, so it's worth investing in high-quality bulbs for the best results. Remember, you're investing in beauty, so choose wisely! Research different varieties online or visit your local garden center to see what's available and get expert advice.
- Zantedeschia aethiopica: Classic white, hardy and reliable.
- 'Picasso': Multicolored blooms, visually striking.
- 'Black Star': Deep purple/almost-black, dramatic and unique.
- 'Flame': Bright yellow to orange, vibrant and cheerful.
Choosing the Right Calla Lilies for You
The best calla lily flower bulbs for you will depend on your climate, the amount of sunlight your garden receives, and your personal preferences. If you live in a warmer climate, you might be able to grow a wider range of varieties, including those that prefer full sun. But if you live in a cooler area, you might need to choose hardier varieties that tolerate some shade. Don't be afraid to experiment and find what works best for your garden!
Consider the overall design of your garden. Do you want your calla lilies to be the focal point, or would you prefer them to blend seamlessly with other plants? Think about the colors and textures of your other plants to ensure your calla lilies complement your existing landscape. A little planning can go a long way in creating a beautiful and harmonious garden.
Caring for Your Calla Lily Flower Bulbs: Tips for Success

Caring for Your Calla Lily Flower Bulbs: Tips for Success
Watering Wisely
Consistent moisture is key, but avoid overwatering! Think of it like this: you wouldn't drown a houseplant, would you? Water deeply but infrequently, allowing the top inch or two of soil to dry out between waterings. Feel the soil; if it's dry to the touch, it's time to water. During the growing season (spring and summer), you might need to water more frequently, especially during hot, dry spells. In the fall and winter, reduce watering as the plants go dormant.
Overwatering can lead to root rot, a common problem for calla lilies. Good drainage is crucial, and ensure your pots have drainage holes if you're growing them in containers. Observe your plants; wilting leaves are a sign of underwatering, while yellowing leaves can indicate overwatering. Pay close attention to your plants' cues, and adjust your watering accordingly. Remember, a happy calla lily is a well-hydrated but not waterlogged calla lily.
Season | Watering Frequency | Signs of Overwatering | Signs of Underwatering |
|---|---|---|---|
Spring/Summer | More frequent, deeply | Yellowing leaves, mushy stems | Wilting leaves, dry soil |
Fall/Winter | Less frequent | N/A (dormant period) | N/A (dormant period) |
Feeding Your Flowers
Just like us, calla lilies need nourishment to thrive! Feed them regularly during the growing season with a balanced liquid fertilizer, following the package instructions. Avoid over-fertilizing, as this can burn the roots and damage the plants. A slow-release granular fertilizer is another option, providing a consistent supply of nutrients throughout the growing season. Consider using a fertilizer specifically formulated for flowering plants to encourage abundant blooms.
Remember, healthy soil is the foundation for healthy plants. Enrich your soil with compost or other organic matter before planting to provide a nutrient-rich environment for your calla lilies. Consider performing a soil test to determine the existing nutrient levels in your soil and adjust your fertilization plan accordingly. Regular feeding, combined with healthy soil, will help your calla lilies produce stunning flowers and vibrant foliage.
- Use a balanced liquid fertilizer during the growing season.
- Avoid over-fertilizing.
- Consider a slow-release granular fertilizer.
- Amend soil with compost before planting.
- Perform a soil test to check nutrient levels.